What are Streams?
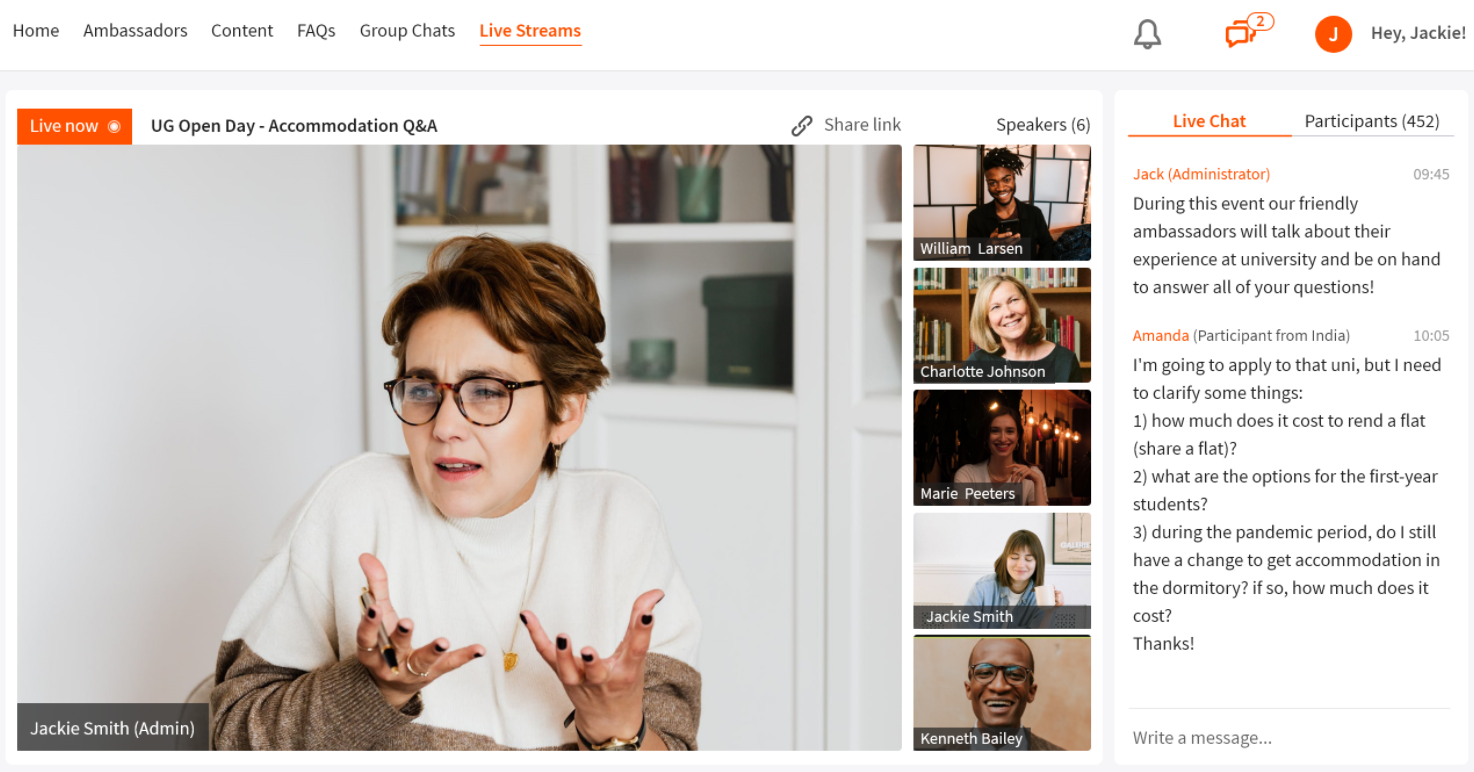
Streams is a feature that lets you connect ambassadors and prospective students through live or recorded video content. It supports:
Live Streams: Host events directly on the platform.
On-Demand Streams: Upload recordings from any platform to your Feed.
Both formats encourage engagement through group chats and help you capture prospect data for reporting and follow-up.
How do I run a Live Stream?
Live Streams are ideal for events like:
Webinars
Virtual Open Days
Taster Sessions
Information Sessions
Q&As
To set up a Live Stream:
Go to the Live Streams tab.
Click + Create Event.
Add event details: name, date, time, speakers, and tags.
Choose visibility: Public (visible on the Feed) or Private (accessible via link).
Start the event from your Admin Dashboard.
During the event:
Admins, ambassadors, and external speakers can share video/audio.
Prospects and ambassadors interact via group chat.
Admins can moderate the chat, delete messages, and stop the event.
The chat remains open after the event unless manually closed.
Safeguarding and monitoring tools are built into the dashboard, so you don’t need external software.
How do I upload an On-Demand Stream?
Use On-Demand Streams to share recordings of past events, regardless of the original platform.
To upload a recording:
Go to the On-Demand Streams tab.
Click + Upload Recording.
Add title, description, and tags.
Choose visibility: Public or Private.
Enable group chat and set up custom data capture fields.
Prospects can:
Watch recordings at their convenience.
Engage with ambassadors via chat or 1-2-1 messaging.
Join communities built around specific content.
Admins get full reporting, including a list of prospects who signed up to view the content.
How do I use the Landing Pages feature in TAP?
Landing Pages make it easier to deliver a targeted, personalised, and engaging student experience by bringing relevant Streams and content together in one place.
To create a Landing Page:
1. Go to the Landing Page tab.
2. Click + Create.
3. Enter a Landing Page name.
4. Add a UTM Source Tag (optional):
o Enter the source you want to track in your reporting data.
o Example: Website
5. Add a UTM Campaign Tag (optional):
o Enter the campaign name you want to track.
o Example: Open Day
6. Add a Page Title (optional):
o This title will appear at the top of the Landing Page when a user opens the link.
o Example: Chat with our international students
7. Add a Page Description (optional):
o Add a short description to introduce the content or explain what students can expect from the page.
8. Select Streams:
o Choose the Streams you want to display on your Landing Page.
9. Preview and embed
o Review your setup
o Copy the embed code
o Add it to your email campaign
Want to learn more?
If you want to try out Live Streams, just reach out to your Client Success Manager or send a message to [email protected] 😊
Related Actions
Want to learn how to tag or group ambassadors for your events? Check out our guide to our Tag Manager.